Quantcast
Channel: Reverse Engineering – Didier Stevens
Viewing all 31 articles
Browse latest View live

AutoIt Malware Revisited

$
0
0

Since I’ve blogged about malware written with the AutoIt scripting language, I got a couple of mails asking for assistance or advice on how to detect and decompile AutoIt malware compiled to executables. In this post, I’m describing a method to identify and reverse AutoIt malware, and I show that old malware packed inside a compiled AutoIt script will elude most AV products.

When you compile an AutoIt script with the Aut2Exe tool, by default, an UPX packed executable is produced. Identifying such a compiled script is easy, the version strings tell you exactly what it is:

autoit_properties.PNG

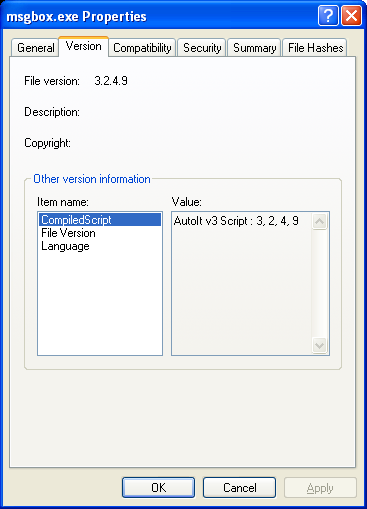
And the (default) file icon in the Windows Explorer view is also a giveaway:

autoit_msgbox.PNG

Of course, it’s easy for a malware author to change these telltale signs. But you can also identify AutoIt malware with a magic number (see further).

Decompiling is easy, just start the decompiler (Exe2Aut, it’s in the extras folder of the AutoIt ZIP installation package) and point it to the executable.

But what if it was compiled with a passphrase, and you don’t know the passphrase? Well, as I pointed out in my previous post, you can still execute the script without providing the passphrase. And I found out some other interesting things.

Add extra whitespace to a script, or change the indentation, compile & decompile it, and the whitespace is preserved. When compilers compile source-code into machine language or intermediate language (like Java bytecode and .NET MSIL), they ignore whitespace. But because we still see the whitespace as we typed it in the decompiled program, it’s very likely that we’re not dealing with a real compiler. I believe that the source-code is stored inside the “compiled” AutoIt script.
Another test supports this hypothesis: write an AutoIt script with a syntax error and compile it. You won’t get an error! It’s only when you execute the compiled script that you’ll get an error. Decompile it, and you’ll get the script with your syntax error!

Like most seasoned computer users, I don’t RTFM before I start using software. But I skimmed the AutoScript help file for my research, and here is what I found:

Technical Details
The compiled script and additional files added with FileInstall are compressed with my own (Jon) compression scheme.
Because a compiled script must “run” itself without a password it needs to be able to decrypt itself – i.e., the encryption is two-way. For this reason you should regard the compiled exe as being encoded rather than completely safe. For example, if I wrote a script that contained a username and password (say, for a desktop rollout) then I would be happy using something like a workstation-level user/password but I would not consider it safe for a domain/entire network password unless I was sure that the end-user would not have easy access to the .exe file.

The AutoIt author (Jonathan Bennett) is aware of the limitations of his protection scheme and discloses them. That’s very professional of him.

FileInstall is also an interesting feature for malware authors: it allows you to include (binary) files in the compiled script. The script itself is also stored as a file. And it’s not only the file content that is stored, but also file properties like the original filename and timestamps. When a malware is included in a compiled AutoIt script with FileInstall, most AV products will not detect it. Here’s a little test:

I took an old Warezov / Stration e-mail worm that all AV products on VirusTotal detect. Then I included this worm in a compiled AutoIt script with FileInstall, and let VirusTotal do its work. Only 4 AV products detected it, and only 2 of these (F-Secure & Kaspersky) detected it as a Warezov / Stration e-mail worm! I cannot trust the results of the other 2 AV products that detected it, because they will also identify an empty AutoIt script as malware. The 2 reliable AV products even detected the virus inside the AutoIt script when it was compiled with a passphrase and with the new fileformat (see further).

So how about decompiling passphrase protected AutoIt malware? Well, it’s easy. A compiled script contains the MD5 hash of the passphrase, and the obfuscation routine is based on the MD5 hash, not on the passphrase itself (this will work with version 3.2.5.1 and earlier compiled scripts).

Here’s my howto (there are other methods to do this):

  1. Unpack the executable (UPX –d malware.exe)
  2. Open the unpacked executable with a binary editor, and search for the magic number A3484BBE986C4AA9994C530A86D6487D
  3. This magic number will be followed by string AU3!EA05 (if you find AU3!EA06, you’re dealing with the new version that can’t be decompiled with the Exe2Aut decompiler). The MD5 hash of the passphrase is stored in the 16 bytes following this AU3!EA05 string (in fact, an AutoIt script compiled to an executable is just the AutoIt interpreter PE file with the compiled script appended at the end)
  4. Once you’ve recovered the MD5 hash, you have 2 options
  5. Try to reverse the MD5 hashing (brute-force, dictionary, rainbow tables, …) to obtain the original passphrase and use this with the decompiler
  6. If this fails, or you don’t like this option, try the following trick
  7. Start the Exe2Aut decompiler (I’m using version 3.2.4.9 on Windows XP SP2) with a debugger like OllyDbg
  8. Set a breakpoint at 0×00402064
  9. Start debugging, and decompile your file. After clicking the Convert button, the debugger will pause at the breakpoint
  10. At the address pointed to by EBX+ESI (0x0012F520 in my test), you’ll find the 16 bytes of the MD5 hash of the passphrase you entered (it will be equal to the well-known MD5 hash d41d8cd98f00b204e9800998ecf8427e if you’ve left the passphrase empty)
  11. Replace this hash with the MD5 hash you recovered from the malware
  12. Continue debugging
  13. Voilà, the Aut2Exe decompiler produced the source code of the malware

This debugger method also works if the checkbox “Allow decompilation” was unchecked when the AutoIt script was compiled. The reason is that when this flag is unchecked, the compiler will generate a long random passphrase and use this to compile the script.

Since I’ve worked out this method, a new AutoIt version was released with a new fileformat (AU3!EA06). This new obfuscation scheme doesn’t use passphrases (and hence no MD5 hash) and Jonathan Bennett doesn’t release a decompiler for this format. Of course, someday, someone will spend the time needed to reverse this scheme. And Jonathan is aware of this, he warns developers for this on the AutoIt forums.

Browsing these forums, I learned that AutoIt is also used heavily for gamebot development and that developers are urged to move to the new version to avoid decompilation. There is an interesting ecology of reversing and anti-reversing tricks, like this one. When malware developers start picking up these tricks, we will have a harder time reversing AutoIt malware.


Introducing the Basic Process Manipulation Tool Kit

$
0
0

For about a month or two now, I’ve been working on a toolkit to manipulate processes (running programs) on Windows. I’ve been using it mainly to research security mechanisms implemented in user processes, like Microsoft .NET Code Access Security.

Here are some of the design goals of the toolkit:

  • the toolkit must support limited accounts (accounts that are not local administrators) as much as possible
  • flexibility: provide a set of commands that can be assembled in a configuration file to execute a given task
  • the toolkit must be able to operate as a single EXE, without requiring the installation of supporting environments like Python
  • it must be a command-line tool

The toolkit has commands to search and replace data inside the memory of processes, dump memory or strings, inject DLLs, patch import address tables, … I’ll be posting examples in the coming weeks, illustrating how these commands can be used.

I’m releasing a beta version of the toolkit now, you can download it here.

This is an example of a configuration file (disable-cas.txt) to disable CAS for a given program (exactly like CASToggle does):

process-name CASToggleDemoTargetApp.exe
write version:2.0.50727.42 hex:7A3822B0 hex:01000000
write version:2.0.50727.832 hex:7A38716C hex:01000000
write version:2.0.50727.1433 hex:7A3AD438 hex:01000000

It looks for processes with the name CASToggleDemoTargetApp.exe, and will then write to the memory of these processes to set a variable to 1 (hex:01000000). The address to write to depends upon the version of the DLL containing the variable. If the DLL has version 2.0.50727.42, we will write to address 7A3822B0. For version 2.0.50727.832, we will write to 7A38716C, … So in this configuration file, at most one write command will be successful and write to memory.

Launch the toolkit with the configuration file like this:

bpmtk disable-cas.txt

You can also use the toolkit to audit programs, for example to check if they protect secrets correctly. Let’s investigate how Firefox keeps passwords (I tested this with Firefox 2.0.0.12 English on Windows XP SP2):

I created a new Firefox profile, defined a master password and stored two passwords: one for Google (BigSecretGoogle) and one for WordPress (BigSecretWordpress).

This is the config file:

process-name firefox.exe
strings address:on memory:writable regex:BigSecret

This config file will search inside the memory (only the writable virtual memory) of Firefox for strings containing the string BigSecret, and dump them to the screen, together with the address where they were found.

Let’s start Firefox and search inside the memory (bpmtk demo-firefox-passwords.txt):

bpmtk-0009.png

No BigSecrets here. Now let’s navigate to Google mail. We are prompted for the master password, so that Firefox can complete our credentials on the login screen:

bpmtk-0010.png

bpmtk-0012.png

Let’s take another peek inside the memory of the Firefox process:

bpmtk-0013.png

It should be no surprise that we find our Google password in memory (at 2 different addresses, the U indicates that we found a Unicode string).

Now let’s go to Firefox’s options and display the passwords:

bpmtk-0014.png

bpmtk-0015.png

The password manager displays the stored URLs and the usernames, but not the passwords. Let’s take another peek inside the memory of the Firefox process:

bpmtk-0016.png

This time, Firefox has also decrypted our WordPress password (BigSecretWordpress), although it’s not displayed. It’s only displayed if we provide the master password a second time:

bpmtk-0017.png

bpmtk-0018.png

So although Firefox prompts you a second time for the master password to display all the passwords, the passwords have already been decrypted in memory before you provided the master password a second time.

Now I don’t have issues with this behavior of the password manager of Firefox, I don’t think it’s a security issue (I’ve an idea why it was programmed like this). But if Firefox was a perfect program, all passwords would only be decrypted when a user explicitly asks to display all passwords.

Do you make online payments with your credit card? Now that I’ve showed you how you can look for specific strings inside a running program with my toolkit, you should know how to use it to check how long your browser keeps your credit card number inside its memory. And can you find out how to use bpmtk to erase that number from your browser’s memory?

Let me finish with an appetizer: I’ve also developed a DLL that, once injected inside a process, will instantiate a scripting engine inside said process, and start executing a script inside the process. This allows you to inject a script inside a process, which can be handy for rapid prototyping or when you’re operating in a limited environment where you don’t have a C compiler to develop a custom DLL to inject. Of course, a script is not as powerful as a compiled C program, but I’m adding some objects to provide some missing functionality.

This script injector will be released with an upcoming version of the bpmtk.


bpmtk: Replacing Gpdisable

$
0
0

Gpdisable is a tool to bypass group policy as a limited user, posted by Marc Russinovich on his blog when he was still the owner of Sysinternals. But now that Sysinternals is owned by Microsoft, the tool is not available anymore.

My Basic Process Manipulation Tool Kit can replace Gpdisable, I’ll show how and give you one more trick.

LikeMarc did, you can inject a DLL that will patch the IAT to subvert NtQueryValueKey, but I’ll leave this technique for an upcoming post.

My example doesn’t require you to program a DLL to inject: since we want to hide the TransparentEnabled registry key, we will just rename the key in the process memory of the programs that impose Software Restriction Policies on us (like explorer.exe). Here is the bpmtk config file to achieve this goal:

dll-name advapi32.dll
#rename TransparentEnabled to AransparentEnabled
search-and-write module:. unicode:TransparentEnabled ascii:A

This will patch each process you’ve rights to and who has loaded advapi32.dll (this DLL enforces SRP).

But as Mark writes in his blog, this will not work for running processes because they have already cached the value of TransparentEnabled and are thus not querying the registry anymore. This is why many people reported that Gpdisable didn’t work for them. Gpupdate /force will force a refresh of the policies, and invalidate the cache.

But if you’re in a restricted environment, there’s a chance you’re prevented from doing a gpupdate. Here’s another way: set the variable _g_bInitializedFirstTime to 0, this will also invalidate the cache. For advapi32.dll version 5.1.2600.2180, this variable is at address 77E463C8. Our script becomes:

dll-name advapi32.dll
#rename TransparentEnabled to AransparentEnabled
search-and-write module:. unicode:TransparentEnabled ascii:A
write version:5.1.2600.2180 hex:77E463C8 hex:00

bpmtk: DisableAMD

$
0
0

Remember my DisableAMD post? In stead of patching the EXE file, you can also use my Basic Process Manipulation Tool Kit to patch the running process.

There is a small difficulty, however. The check for the DisableCMD key is done when CMD.EXE is started, so to be successful, we have to start the program and change the DisableCMD string in memory before the check is made. Sounds impossible? Not really, the CreateProcess function allows you to create a new process with its main thread in a suspended state (this means that the program is not running). This gives you the opportunity to change the string in memory before it is used.

Use the start statement to start a new process in suspended state:

start cmd.exe

Change the string in memory:

search-and-write module:. unicode:DisableCMD unicode:DisableAMD

The main thread will be resumed after the last statement was executed (search-and-write in our example):

start-cmd-w2k8.png

The cmd.exe window in the background was launched from the start menu (showing you that cmd.exe is disabled), while the cmd.exe window in the foreground was launched with the bpmtk (showing you the bypass of the GPO).

And did you notice that this screenshot is taken on a Windows 2008 server?

Next time, I’ll show some tricks to use the bpmtk in a restricted environment, like a Terminal Server.


F-Secure Reverse Engineering Challenge 2008

A Third SpiderMonkey Trick

$
0
0

This escaped my attention, but SpiderMonkey 1.7 has been released for some time now.

I patched this new version (download on my SpiderMonkey page), and decided to add another small trick: implement the window object with the navigate method:


Quickpost: SQL Server 2005 Management Studio and Password Management

$
0
0

Another stored password question I was asked: where does SQL Server 2005 Management Studio store the passwords, and are they encrypted?

When you set the Remember Password toggle:

the password is saved in this file (default install, Administrator account):
C:\Documents and Settings\Administrator\Application Data\Microsoft\Microsoft SQL Server\90\Tools\Shell\mru.dat

The password is not stored in cleartext. The file contains a BASE64 blob, strongly resembling a DPAPI protected data blob.

Convert it to hex:

(all the protected DPAPI data blobs I’ve seen start with byte sequence 01 00 00 00 D0 8C 9D…)

Let’s decode this with CryptUnprotectData (all optional parameters set to NULL):

We get no error, proving that it’s indeed data protected by DPAPI on this machine for this user. The content is just the password in UNICODE.

The nice thing for a software developer, is that DPAPI allows him to encrypt/decrypt data without having to worry about encryption keys. For details on all the keys used by DPAPI, read this MSDN article.


Quickpost info

The Case of the Corrupted Stream Object

$
0
0

A malicious PDF file I analyzed a couple of months ago (the one featured in this video) had a corrupted stream object. It uses a /FlateDecode filter, but I could not find a way to decompress it with the zlib library. Back then, I wrote it off as an error of the malware author.

Lately, I’ve been analyzing some shellcode, and while looking at the shellcode in said malicious PDF, I saw it! The second-stage shellcode, a egghunt shellcode, is searching through process memory for the 8 bytes at the beginning of the corrupted stream object.

The malware author knows that the PDF reader loads the PDF document in memory, so he just overwrote the stream object with his third-stage shellcode. This way, his third-stage shellcode is already in memory, waiting to be found by his second-stage shellcode. And the size of his third-stage shellcode is not limited by the buffer he is overflowing.


Quickpost: TeamViewer and Proxies

$
0
0

Sorry for the lack of recent posts, I’ve been ill and had to catch up with a lot of work.

Braden Thomas wrote an interesting series of posts on reversing the TeamViewer protocol.

I want to add my own observation: when TeamViewer is forced to communicate over an HTTP proxy, it will issue GET statements with parameter data that can be decoded in a similar way as Braden describes for the direct protocol (i.e. without proxy).

First of all, to identify TeamViewer traffic in proxy logs, you look for this User Agent String: “Mozilla/4.0 (compatible; MSIE 6.0; DynGate)”.

You will see HTTP GET requests like this one:

hxxp://178.77.120.6/dout.aspx?s=55194936&p=10000001&client=DynGate&data=FyQSAAExtjSytzoeqisTMbe3NzKxujS3tza3sjKemJMzHqkyu…

When you decode the value of the data= parameter as base64, you can identify the version of the protocol (first 2bytes) and the command (3rd byte):

0×1724 0×12

0×12 is a CMD_MASTERCOMMAND. By left-shifting the data from the 5th byte with 1 bit, you can decode the arguments of a MASTERCOMMAND, like this:

client=TV&connectionmode=1&f=RequestRoute2&homeserver=&ic=708710721&id=123456789&id1=123456789&id2=987654321&licensecode=…

When parameter f (the function) is RequestRoute2, you know that the TeamViewer user issued a command to connect to another TeamViewer client. Parameter id identifies the originating client (123456789 in my example), and parameter id2 identifies the destination (987654321 in my example).


Update XORSearch V1.8.0: Shifting

$
0
0

This new version of XORSearch comes with a new operation: shifting left.

It comes in handy to reverse engineer protocols like TeamViewer’s remote access protocol.

Here’s an example. When you run TeamViewer, your machine gets an ID:

20-02-2013 22-11-39

We capture some TeamViewer traffic with Wireshark, and then we use XORSearch to search for TeamViewer ID 441055893 in this traffic:

20130216-231230

And as you can see, XORSearch finds this ID by left-shifting the content of the pcap file with one bit.


Cisco IOS Patching: Defense and Offense

$
0
0

I will give a talk on network forensics at my local ISSA chapter.

I’m preparing it with a couple of PoCs.

First PoC is how changing the canary value 0xFD0110DF to another value can provide defense against exploits like FX explained in this paper. I changed the appropriate instructions so that IOS uses canary value OxFC0220CF. You can see it at the bottom of this memory dump:

20130327-232310

Second PoC is how I can change the behavior of an IOS command for offensive purposes. Topo mentioned this idea at Black Hat. The verify command checks the embedded MD5 signature in an IOS image. I patched the appropriate instructions so that the verify command always reports a valid signature, regardless of the actual embedded value:

20130327-233004

I did not change CCO hash. This is the MD5 hash of the complete IOS image. I did not change this on purpose, but it would be as easy as changing the embedded hash. If you lookup this CCO hash with Cisco, you will not find it.


New Tool: XORStrings

$
0
0

XORStrings is best described as the combination of my XORSearch tool and the well-known strings command.

XORStrings will search for strings in the (binary) file you provide it, using the same encodings as XORSearch (XOR, ROL, ROT and SHIFT). For every encoding/key, XORStrings will search for strings and report the number of strings found, the average string length and the maximum string length. The report is sorted by the number of strings found, but can also be sorted by the maximum string length (use option -m). By default, the string terminator is 0×00, but you can provide your own with option -t, like the space character (0×20) in this example:

20130308-213053

I’ve used XORStrings to identify the encoding used in TeamViewer traffic.

There are more options than the ones I mentioned here. I’ll create a dedicated page for this tool, but for now, I invite you to discover the options yourself.

XORStrings_V0_0_1.zip (https)
MD5: 27DA0B3BC5296179CB58181BDFF99F8D
SHA256: 5EA7E063A41E38E9E6277F1CD73FCEA2AEF50C33C44D75C226900314FF84A1B5


pecheck.py

$
0
0

As a thank you to those who nominated me for the European Security Bloggers Awards, I’m going to release some new scripts this week. Here’s the fourth one.

pecheck.py is a wrapper for pefile, but this version has a new feature: check a PE file stored in a (password protected) ZIP file (password infected).

pecheck_v0_3_0.zip (https)
MD5: C2AC9FED3C7F1787854C8D0E651B2591
SHA256: 3CDEBADA4C594DD3622E234747C6AABD41573C94087C0554CBA65D0472F6B413


Extracting Dyre Configuration From A Process Dump

$
0
0

There are a couple of scripts and programs available on the Internet to extract the configuration of the Dyre banking malware from a memory dump. What I’m showing here is a method using a generic regular expression tool I developed (re-search).

Here is the Dyre configuration extracted from the strings found inside the memory dump:

2015-07-12_14-47-24

I want to produce a list of the domains found as first item in an <litem> element. re-search is a bit like grep -o, it doesn’t select lines but it selects matches of the provided regular expression. Here I’m looking for tag <litem>:

2015-07-12_15-10-39

By default, re-search will process text files line-by-line, like grep. But since the process memory dump is not a text file but a binary file, it’s best not to try to process it line-by-line, but process it in one go. This is done with option -f (fullread).

Next I’m extending my regular expression to include the newline characters following <litem>:

2015-07-12_15-17-35

And now I extend it with the domain (remark that the Dyre configuration supports asterisks (*) in the domain names):

2015-07-12_15-19-58

If you include a group () in your regular expression, re-search will only output the matched group, and not the complete regex match. So by surrounding the regex for the domain with parentheses, I extract the domains:

2015-07-12_15-24-44

This gives me 1632 domains, but many domains appear more than once in the list. I use option -u (unique) to produce a list of unique domain names (683 domains):

2015-07-12_15-28-06

Producing a sorted list of domain names is not simple when they have subdomains:

2015-07-12_15-30-09

That’s why I have a tool to sort domains by tld first, then domain, then subdomain, …

2015-07-12_15-32-28
re-search_V0_0_1.zip (https)
MD5: 5700D814CE5DD5B47F9C09CD819256BD
SHA256: 8CCF0117444A2F28BAEA6281200805A07445E9A061D301CC385965F3D0E8B1AF


Analysis Of An Office Maldoc With Encrypted Payload (Quick And Dirty)

$
0
0

The malicious office document we’re analyzing is a downloader: 0e73d64fbdf6c87935c0cff9e65fa3be

oledump reveals VBA macros in the document, but the plugins are not able to extract a URL:

20151104-194727

Let’s use a new plugin that I wrote: plugin_vba_dco. This plugin searches for Declare statements and CreateObject calls:

20151104-194827

In the first half of the output (1) we see all lines containing the Declare or CreateObject keyword. In the second half of the output (2) we see all lines containing calls to declared functions or created objects.

Although the code is obfuscated (obfuscation of strings and variable names), the output of this plugin allows us to guess that Ci8J27hf2 is probably a XMLHTTP object, because of the .Open, .send, .Status, … methods and properties.

The Open method of the XMLHTTP object takes 3 parameters: the HTTP method, the URL and a boolean (asynchronous or synchronous call):

20151104-195006

As we can see, the third parameter is False and the first 2 parameters are the return value of a function called IpkfHKQ2Sd. This function takes 2 parameters: 2 strings. The first string is the result of concatenated Chr functions, and the second string is a literal string. Since the Open method requires the HTTP method and URL as strings, is very likely that function IpkfHKQ2Sd is a decoding function that takes 2 strings as input (meaningless to us) and returns a meaningful string.

Here is the original IpkfHKQ2Sd function. It’s heavily obfuscated:

20151104-195102

Here is the same function that I deobfuscated. I didn’t change the function name, but I removed all useless code, renamed variables and added indentation:

20151104-195144

We can now see that this function uses a key (sKey) and XOR operations to decode a secret string (sSecret). And now we can also see that this is just a string manipulation function. It does not contain malicious or dangerous statements or function calls. So it is safe to use in a VBA interpreter, we don’t need to translate it into another language like Python.

We are going to use this deobfuscated function in a new spreadsheet to decode the URL parameter:

20151104-195359

In the VBA editor of this new spreadsheet, we have the deobfuscated IpkfHKQ2Sd function and a test subroutine that calls the IpkfHKQ2Sd function with strings that we found in the .Open method for the URL argument. The decoded string returned by function IpkfHKQ2Sd is displayed via MsgBox. Executing this test subroutine reveals the URL:

20151104-195410

Downloading this file, we see it’s not a JPEG file, but contrary to what we could expect, it’s neither an EXE file:

20151104-195912

Searching for .responseBody in the VBA code, we see that the downloaded file (present in .responseBody) is passed as an argument to function IpkfHKQ2Sd:

20151104-195823

This means that the downloaded file is also encoded. It needs to be decoded with the same function as we used for the URL: function IpkfHKQ2Sd (but with another key).

To convert this file with the deobfuscated function in our spreadsheet, we need to load the file in the spreadsheet, decode it, and save the decoded file to disk. This can be done with my FileContainer.xls tool (to be released). First we load the encoded file in the FileContainer:

20151104-200044

20151104-200105

FileContainer supports file conversion: we have to use command C and push the Process Files button:

20151104-200125

Here is the default conversion function Convert. This default function doesn’t change the file: the output is equal to the input:

20151104-200214

To decode the file, we need to update the Convert function to call the decoding function IpkfHKQ2Sd with the right key. Like this:

20151104-200424

And then, when we convert the file, we obtain an EXE file:

20151104-200952

This EXE turns out to be Dridex malware: 50E3407557500FCD0D81BB6E3B026404

Remark: reusing code from malware is dangerous unless we know exactly what the code does. To decode the downloaded file quickly, we reused the decoding VBA function IpkfHKQ2Sd (I did not translate it into another language like Python). But to be sure it was not malicious, I deobfuscated it first. The deobfuscation process gave me the opportunity to look at each individual statement, thereby giving me insight into the code and come to the conclusion that this function is not dangerous. We could also have used the obfuscated function, but then we ran the risk that malware would execute because we did not fully understand what the obfuscated function did.

Translating the obfuscating function to another language doesn’t make it less dangerous, but it allows us to execute it in a non-Windows environment (like Linux), thereby preventing Windows malware from executing.


Analysis Of An Office Maldoc With Encrypted Payload (Slow And Clean)

$
0
0

In my previous post we used VBA and Excel to decode the URL and the PE file.

In this  post we will use Python. I translated the VBA decoding function IpkfHKQ2Sd to Python:

20151105-223017

Now we can decode the URL using Python:

20151105-223901

And also decode the downloaded file with my translate program and the IpkfHKQ2Sd function:

20151105-224328

20151105-224636


Analysis Of An Office Maldoc With Encrypted Payload: oledump plugin

$
0
0

After a quick and dirty analysis and a “slow and clean” analysis of a malicious document, we can integrate the Python decoder function into a plugin: the plugin_dridex.py

First we add function IpkfHKQ2Sd to the plugin. The function uses the array module, so we need to import it (line 30):

20151106-222710

Then we can add the IpkfHKQ2Sd function (line 152):

20151106-222928

And then we can add function IpkfHKQ2Sd to the list in line 217:

20151106-223132

This is the code that tries different decoding functions that take 2 arguments: a secret and a key.

I also added code (from plugin_http_heuristics) to support Chr concatenations:

20151106-223608

The result is that the plugin can now extract the URLs from this sample:

20151106-222050

Download:
oledump_V0_0_19.zip (https)
MD5: DBE32C21C564DB8467D0064A7D4D92BC
SHA256: 7F8DCAA2DE9BB525FB967B7AEB2F9B06AEB5F9D60357D7B3D14DEFCB12FD3F94


Quickpost: Dropbox & Alternate Data Streams

$
0
0

When I got this popup while moving a file from a Dropbox folder, I immediately thought Alternate Data Stream:

20170124-221042

I ran my filescanner on the file, and found an ADS with name com.dropbox.attributes:

20170128-094319

From the Magic HEX value, we can see that the content of the stream (frozen-sea-foam.mp4:com.dropbox.attributes) starts with 0x78 (and the streamsize is 83 bytes). 0x78 hints at zlib deflated data.

If you are not that familiar with magic values, you can use my file-magic tool:

20170128-224649

Trying to decompress the ADS with translate.py gives us JSON data {“dropbox_fileid_local”: {“machineid_attr”: {“data”: “aa4xliox7z5n0qewxOlT3Q==”}}}:

20170128-102645

The data field looks like BASE64, so let’s try to decode it with base64dump.py:

20170128-104110

It decodes with BASE64 to data that looks random. From the names in the JSON data, we can deduce that this is probably a machine ID.

Remark 1: as it could well be my unique machine ID, I altered the value of the ID.

Remark 2: my file-magic.py tool is beta.

Remark 3: if you wonder what the video frozen-sea-foam is, I have it on Instragram.


Quickpost info


WannaCry Simple File Analysis

Quickpost: Windows Debugger as Post Mortem Debugger – 32-bit & 64-bit

$
0
0

I was following Microsoft’s advice to install WinDbg as a post mortem debugger, but didn’t get the expected results.

It turns out that WinDbg x64 version will register itself as the post mortem debugger for 64-bit and 32-bit processes, and not just for 64-bit processes:

Of course, WinDbg x86 version will register itself only for 32-bit processes:

So to make sure that WinDbg x64 version will debug only 64-bit processes and WinDbg x86 version will debug 32-bit processes, run the post mortem registration commands in this order:

"c:\Program Files (x86)\Windows Kits\10\Debuggers\x64\windbg.exe" -I
"c:\Program Files (x86)\Windows Kits\10\Debuggers\x86\windbg.exe" -I

And of course, run the commands from an elevated command prompt, as you’ll need to write to the HKLM hive. Otherwise you’ll get a reminder:


Quickpost info


Viewing all 31 articles
Browse latest View live